
When and How to Mulch Garden Beds
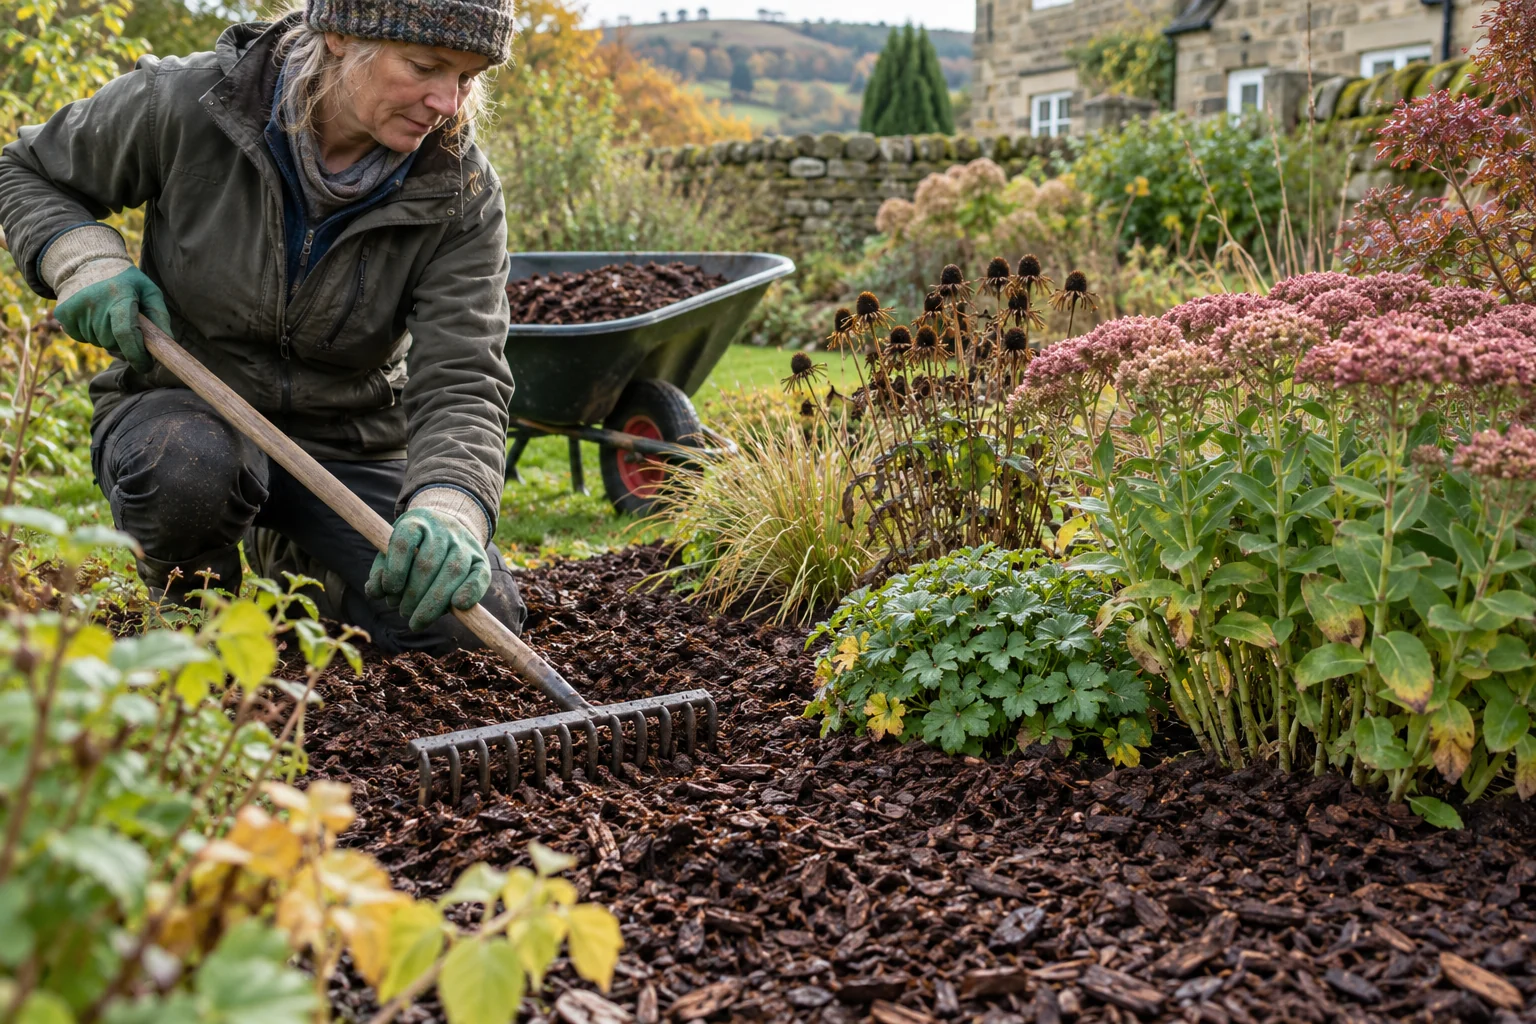
Mulching helps garden beds flourish, and timing is key. Gardeners should apply mulch in mid to late spring when the soil has warmed, and again in autumn to protect plants from winter’s cold. Start by removing weeds and debris before laying down a 2-4 inch layer of organic material, like wood chips or straw, around the plants, ensuring it does not touch the stems. This retains moisture, suppresses weeds, and enriches the soil as the mulch breaks down, fostering a healthy environment for plant growth.
When to Mulch Garden Beds
Mid to late spring and autumn are the best times for mulching garden beds. These seasons help plant health and control weeds. In spring, apply mulch once the soil has warmed but before it dries completely. This timing prevents annual weeds from sprouting and retains moisture for new plants.
Autumn is ideal for mulching as perennials wind down. Adding mulch protects roots from winter cold and allows organic materials to decompose into nutrient-rich compost before spring growth resumes.
The Royal Horticultural Society advises waiting until after significant rains have soaked the ground, ensuring you work with damp soil for better water penetration and root establishment beneath the mulch.
Mid to Late Spring
In mid to late spring, applying mulch can help keep annual weeds under control while retaining moisture for your growing plants.
Autumn
Autumn provides an excellent opportunity to protect perennial roots from upcoming frost while enriching your garden bed with decomposing material ahead of next year’s growth.
Preparing Beds for Mulching
Before applying mulch, prepare your garden beds by removing weeds and debris. Established weeds can grow under the mulch, undermining its effectiveness. Pay attention to perennial weeds like bindweed or couch grass that may resurface. For a thorough method, try sheet mulching: place cardboard over the cleared area, soak it with water, and cover it with compost or bark.
This technique suffocates existing plants and improves soil as the materials break down.
Once prepared, spread your chosen mulch evenly across the exposed soil at a depth of about 5 to 7 cm (2 to 3 inches). If facing heavy weed pressure, use slightly thicker layers of around 7 to 8 cm (about 3 inches). A layer that is too thin won’t block sunlight effectively or retain moisture; ensure there’s space around plant stems, about 10 cm from woody plants, to prevent rot and disease from excess moisture.
For Trees and Shrubs Specifically
Extend your mulch outward toward their drip line where roots seek nutrients. This practice is especially helpful during the first few years after planting when they need access to resources without competition from nearby grasses and weeds. By following these steps before applying mulch, you’ll create a healthy environment for both new plants and established greenery while improving overall garden health!
The Pros & Cons of Garden Bed Mulching
Pros
-
Mulching helps keep weeds down by blocking light, which means less competition for nutrients and water.
-
It saves soil moisture, reducing evaporation and possibly cutting back on how often you need to water.
-
Organic mulches enhance soil structure and fertility as they break down, adding important nutrients.
-
Mulch shields plant roots from extreme temperatures, helping them survive frost during winter.
-
Decorative mulches boost the visual appeal of your garden design.
-
It can help prevent soil erosion by holding the top layer of soil in place against wind and rain.
Cons
-
If you don’t remove established weeds before applying mulch, they may continue to grow underneath it.
-
Organic mulches break down over time and need regular replacement, which means more maintenance for you.
-
Wet mulch can draw in pests like slugs and snails that could harm your plants.
-
Non-biodegradable options won’t improve soil quality or fertility as time goes on.
-
Applying mulch at the wrong depth might not effectively suppress weeds or retain moisture.
-
Some materials could bring in pathogens or pests if they're not sourced carefully.
Choosing Biodegradable and Inert Mulches
When picking the right mulch for your garden, consider both biodegradable and non-biodegradable options. Biodegradable mulches, like wood chips, straw, or well-rotted compost, offer advantages as they break down over time. They add organic matter and nutrients to the soil, improve its structure, and retain moisture. Shredded leaves create a protective layer that suppresses weeds and nourishes the ground as they decompose.
Non-biodegradable Mulch Options
In contrast, non-biodegradable choices like gravel or stone chippings block light from reaching weeds and help retain moisture without adding nutrients to the soil. These materials are suitable for areas where appearance matters; dark-colored stones warm nearby soils in cooler months while lighter colors reflect sunlight on hot days. It’s crucial to match mulch types with plant needs: for instance, Mediterranean herbs may thrive better with gravel instead of organic material that retains too much moisture around their roots.
Conclusion
taking time to choose the right type of mulch for different parts of your garden will support healthy growth and vibrant plants. With many options available, from nutrient-rich composts perfect for vegetable beds to decorative aggregates enhancing pathways, you have opportunities to customize your gardening style!
Determining Mulch Depth and Coverage
Determining the right depth for your mulch is key to maximizing its benefits. Apply a layer that’s about 5 to 7 cm (2 to 3 inches) thick for most garden beds and borders. If you have heavy weed problems, increase this thickness to 8 cm (around 3 inches). This thicker layer effectively blocks sunlight and reduces moisture loss due to evaporation. If spread too thin, these benefits diminish, so apply generously without suffocating low-growing plants.
Mulching Around Trees and Shrubs
When mulching around established trees or shrubs, extend coverage toward the drip line, the outer edge where rainwater falls off leaves. This area contains many actively feeding roots seeking nutrients and moisture. For young trees, keep mulch at least 15-20 cm away from their trunks initially but move closer as they grow stronger. This space prevents rot and allows essential air circulation for healthy development.
Careful Placement Matters
As you lay down mulch, how you place it can improve both aesthetics and function in your landscape design. Avoid stacking mulch against woody stems, as trapped moisture could lead to disease issues later on, a gap of about 10 cm works well for larger plants like shrubs and ornamental trees. Following these tips will help create an environment where plants thrive while making maintenance easier throughout the growing season!
Optimal Timing and Techniques for Mulching
| Mulch Type | Description | Benefits | Notes |
|---|---|---|---|
| Biodegradable Materials | Includes garden compost, wood chippings, processed conifer bark, leaf mould, well-rotted manure, straw, spent hops, seaweed. | Suppresses weeds, conserves moisture, improves soil structure and fertility as it decomposes. | Needs replacing as they rot down; compost, leaf mould, and manure are nutrient-rich options. |
| Non-Biodegradable Materials | Consists of slate, shingle, pebbles, gravel, stone chippings, decorative aggregates. | Suppresses weeds, conserves moisture, does not improve soil structure or fertility. | Dark materials warm soil; light materials keep roots cooler. Avoid plastic materials. |
| Grass Clippings | A specific type of biodegradable mulch. | Suppresses weeds and retains moisture. | Should be applied in a thin layer of no more than 2cm to avoid matting. |
| Cardboard | Used for deliberate sheet mulching. | Blocks light to prevent weed germination. | Lay over weeds, water thoroughly, and cover with compost or bark. |
| Organic Mulch | Includes any biodegradable material used on soil surface. | Improves water retention as it breaks down. | Can be topped up as it decomposes; check beds regularly for visible bare soil. |
| Gravel | A non-biodegradable option suitable for certain areas. | Reduces soil disturbance, assists drainage. | Useful around alpine plants and pond margins. |
| Well-Rotted Manure | A nutrient-rich biodegradable option. | Particularly suitable for hungry plants like roses. | Apply in a layer of 5 to 7cm after the ground has warmed in spring. |
| Permeable Sheet Mulch | Woven landscape fabric used for new beds or borders. | Allows rain and irrigation to reach roots while suppressing weeds. | Ensure it is permeable to avoid drainage issues; natural hessian is an alternative to plastic. |
Mulching Around Trees and Shrubs
When it comes to trees and shrubs, mulching involves more than just applying organic material; it requires careful attention. Choose your mulch wisely, opt for biodegradable options like shredded bark or well-rotted compost that enrich the soil as they decompose. Spread this layer evenly toward the tree’s drip line, where roots seek water and nutrients. This method maximizes benefits while reducing competition from nearby weeds or grass. For young plants, keep mulch about 15-20 cm away from trunks initially; you can move it closer as they become established.
Proper Spacing Around Woody Stems is Crucial
Maintaining distance around woody stems prevents moisture buildup against sensitive areas and encourages airflow, helping to prevent diseases. Aim for at least a 10 cm gap here! As you continue gardening, remember to apply enough mulch to suppress weeds without suffocating low-growing ground covers. By following these guidelines, you’ll create vibrant spaces filled with healthy foliage that provides enjoyment throughout every season in your garden!
Matching Mulch to Specific Plants
Choosing the right mulch for your plants is essential for their growth. For vegetables, organic options like well-rotted compost or leaf mould enrich the soil and retain moisture. Spread these materials about 5 to 7 cm (2 to 3 inches) deep once seedlings have several sets of leaves.
Mediterranean Herbs
For Mediterranean herbs like lavender and rosemary that thrive in drier conditions, opt for gravel or grit instead of organic mulch. This choice keeps moisture around their roots low and reduces the risk of rot.
Ground-cover Plants
Ground-cover plants like creeping thyme can act as living mulch; allow them to spread naturally rather than covering them with too much material!
Selecting the right type of mulch benefits plant health and improves the overall look of your landscape. Tailor each area based on its specific needs, your vibrant garden awaits!
Unveiling Secrets of Garden Mulching Mysteries
-
Many gardeners think mulching eliminates existing weeds, but mulch mainly prevents new weeds from growing and doesn’t address established ones.
-
People often believe any time is suitable for mulching, yet the best times are mid to late spring and autumn, aligning with plant growth cycles and seasonal shifts.
-
There’s a belief that thicker layers of mulch are always better; yet, most beds do well with a depth of 5 to 7cm (2 to 3 inches), while grass clippings should be no more than 2cm to prevent matting.
-
Some think all types of mulch boost soil fertility, but only biodegradable options like compost and well-rotted manure add nutrients and improve soil structure; non-biodegradable choices don’t provide these benefits.
-
A common belief is that you can apply mulch over frozen ground; yet, it's best to do this on damp soil that's not frozen to avoid keeping the ground cold longer than necessary.
Seasonal Maintenance and Cautions
As you care for your garden beds, pay attention to your mulch as the seasons change. Organic mulches decompose over time, so replenish them regularly to maintain their benefits. In spring and fall, check for bare soil showing through the layer; if it is, it’s time for a fresh top-up! You can usually add new material without removing old mulch unless it has become compacted or waterlogged, which can block moisture from reaching roots.
Pests and Problems
Also, watch for potential issues with damp organic materials. While they retain moisture and suppress weeds, wet mulch can attract pests like slugs and snails in shady spots. To address this, try hand-weeding instead of hoeing around established plants to avoid damaging delicate roots while keeping your garden neat.
Weather Considerations
remember that changes in weather patterns may affect how often you need to inspect your mulched areas, check after heavy rain or long dry spells for a quick look!
Successful Garden Bed Mulching
Achieving successful mulching in your garden requires preparation, technique, and attention to detail. Begin by selecting the right type of mulch, consider biodegradable options like straw or wood chips that improve soil quality as they break down, or non-biodegradable materials like gravel that suppress weeds and retain moisture without adding nutrients.
Once you’ve chosen your mulch, apply it at an appropriate depth; typically around 5 to 7 cm (2 to 3 inches) works well. Adjust this thickness based on your plants’ needs and weed pressure, thicker layers can help where weeds are problematic.
During application, avoid covering low-growing plants completely; leave space around their stems while ensuring enough coverage for reduced evaporation and better soil health. Regular maintenance is key: top up organic mulches before they degrade too much and monitor for pest issues that could affect your garden beds!
FAQ
What types of mulch can I use in my garden, and how do they differ?
Gardeners can choose biodegradable mulches like compost and wood chippings for soil health or non-biodegradable options like gravel for weed control without improving fertility.
When is the best time to apply mulch for optimal benefits?
Apply mulch in mid to late spring and autumn when the soil is moist to retain moisture and control weeds effectively.
How deep should I apply mulch to effectively suppress weeds and retain moisture?
Apply mulch at a depth of 5 to 7cm (2 to 3 inches) over beds and borders, or 7 to 8cm for heavy weed pressure.
What steps should I take to prepare my garden beds before mulching?
Clear weeds from your garden beds before adding mulch to effectively prevent new weeds from sprouting.
How do I maintain my mulch over time, and when should I replace it?
Refresh mulch when it becomes compacted, waterlogged, or if switching types, checking regularly in spring and autumn for bare soil showing through.