
Your Local Guide to Planting Spring Bulbs This Fall
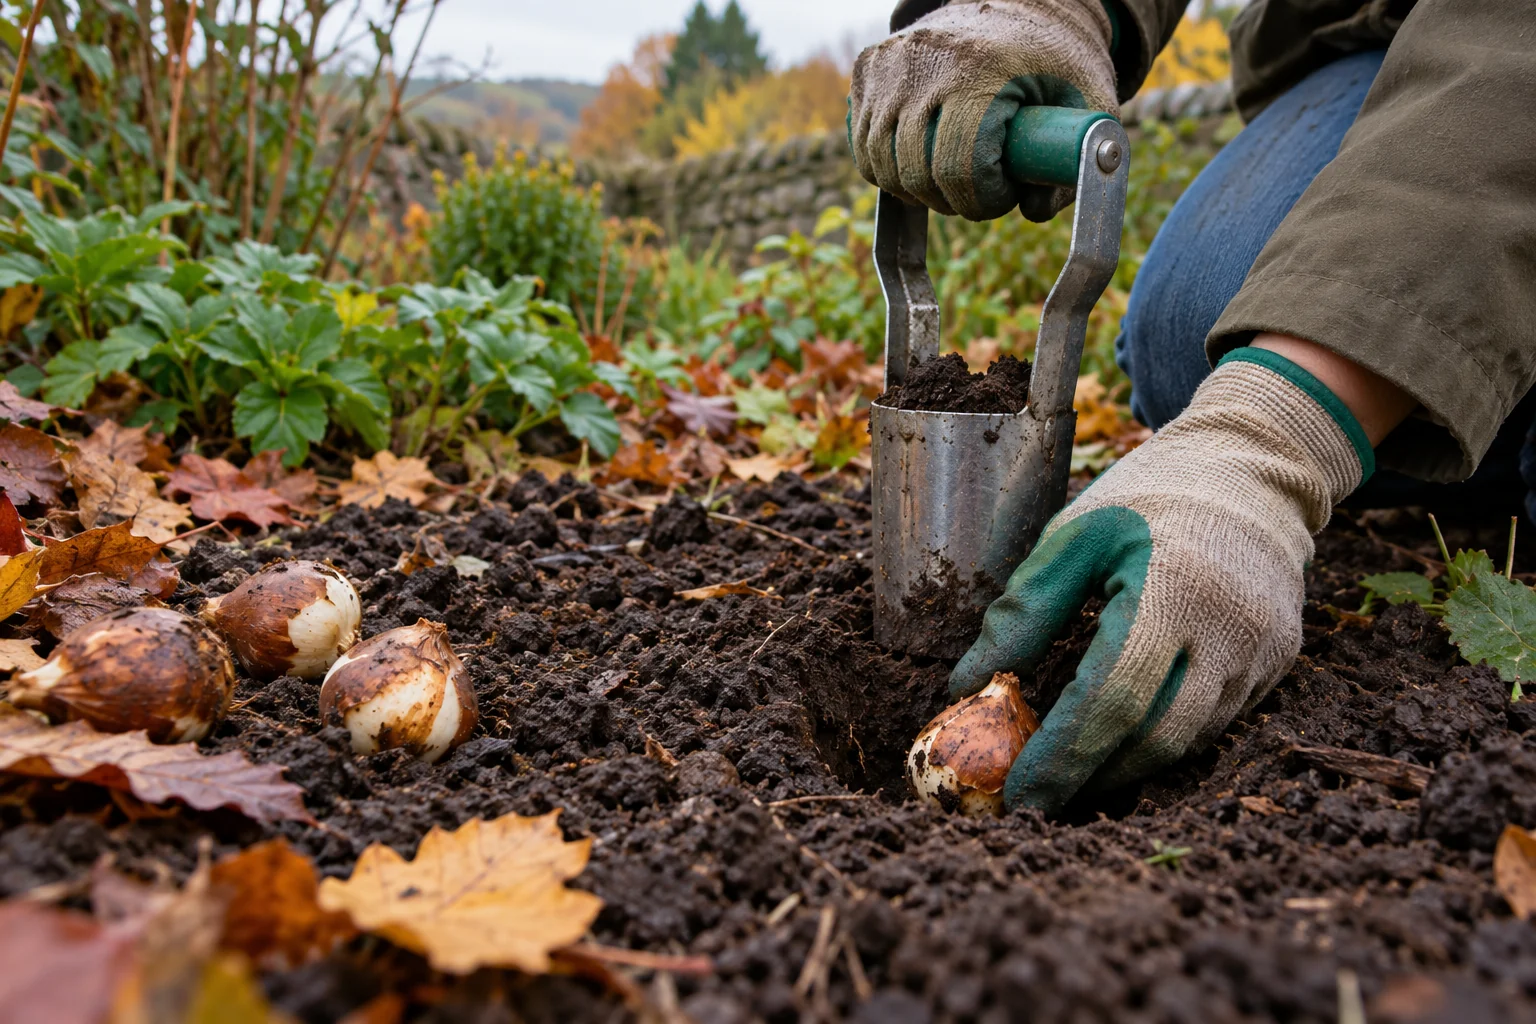
Fall allows gardeners to prepare for a spring display. Planting bulbs now helps them develop roots before winter. By selecting a sunny area with good drainage and digging holes three times as deep as each bulb, gardeners can expect clusters of daffodils, tulips, and crocuses to bloom in warmer days. With careful planning and moisture monitoring, these treasures will transform outdoor areas into vibrant scenes filled with flowers in spring!
Why Plant Spring Bulbs in Autumn
Autumn is a time in the garden to prepare for spring. Planting bulbs now allows them to settle into warm soil before the cold arrives. Increased rain helps keep the ground moist around your newly planted bulbs. Planting soon after buying, especially daffodils and crocuses, gives them time to adjust and thrive when it’s time to bloom.
Timing varies by bulb type; September through October works well for many early bloomers, while tulips do better if planted in November. This staggered approach can help prevent fungal diseases that may arise if warm fall weather persists. By adhering to these planting times, you’re not just putting seeds in the ground, you’re setting up future joy for spring. Each flower holds promise; picture clusters of color emerging as winter fades away!
Choosing the Right Planting Time
As you prepare for planting, knowing the right timing for your bulbs is crucial. Each type has specific requirements; some do better when planted in early autumn, while others thrive if planted later. Daffodils and crocuses should be planted between September and October to establish roots before winter. Tulips prefer planting in November, this delay supports their growth and reduces risks from lingering warm weather.
Understanding each bulb’s needs can significantly impact your spring display. By choosing planting times based on these specifics, you celebrate the variety within your garden. Imagine bright blooms unfolding as nature intended, not rushed by unseasonable warmth or hindered by poor soil preparation!
Newly purchased bulbs are best planted soon after buying; they need time to adjust to their new environment. If you let them sit too long after purchase, you risk reducing their chances of blooming beautifully in spring.
Autumn Moisture
Autumn moisture plays an important role: consistent rainfall keeps the soil at the right level of dampness without overwhelming your bulbs, a perfect balance! This natural watering helps during establishment periods when newly buried bulbs are settling into their surroundings.
Plan carefully around these seasonal cues so every bulb gets what it needs from Mother Nature! As you focus on optimal timing specific to each type of bulb selected, you’re preparing for a vibrant celebration next year when they bloom!
The Pros & Cons of Autumn Bulb Planting
Pros
-
Planting bulbs in autumn helps them develop roots before winter arrives, which boosts their flowering in spring.
-
Rainfall during the season keeps the soil moist around newly planted bulbs.
-
Planting at least six bulbs together creates a more eye-catching look in gardens.
-
Using a bulb lasagne technique allows you to enjoy blooms throughout the seasons by layering different types of bulbs.
Cons
-
If drainage isn't good, bulbs can rot and may not come up in spring.
-
Each type of bulb has its own planting time, so it's important to follow the guidelines closely.
-
Bulbs grown in containers often don't bloom as well in their second year, so it's best to replace them each year.
-
Animals like squirrels might dig up newly planted bulbs, so you'll need some protective measures.
Selecting a Sunny, Drained Site
Choosing the right spot for your spring bulbs is key to their growth. Find a sunny area in your garden where they can absorb sunlight, as most bulbs thrive in it. While some types can tolerate shade, good drainage is essential. Bulbs like daffodils and tulips need soil that drains quickly; otherwise, they may rot in soggy conditions. Checking the drainage before planting will help avoid disappointment when blooms don’t appear.
As you walk around the chosen space, picture how these vibrant flowers will enhance your garden once winter ends. Digging into the ground uncovers potential and creates an environment that supports growth, look for soils rich in organic matter or add grit if dealing with heavy clay! Planting bulbs together boosts visual appeal and creates a beautiful display as each type blossoms at different times throughout the season. Your thoughtful placement now sets up for impressive displays later, a natural tapestry waiting to unfold!
Planting Bulbs in Borders
When planting bulbs in borders, create clusters that attract attention and fit your garden’s design. The Royal Horticultural Society suggests grouping at least six bulbs together for a striking display; larger groups of 25 to 50 can stand out. Picture daffodils blooming alongside crocuses and tulips, each adding charm as they blossom throughout spring. This layered method creates a colorful scene that keeps your garden lively from early March through late May.
Planting Depth
Planting depth is important too; aim for a depth that’s three times the height of each bulb when placing them in the ground. If you plant too shallow, especially with sturdy varieties like daffodils, you’ll likely see fewer flowers year after year. For delicate options like snowdrops and bluebells, consider planting them “in the green” while they’re still leafy after flowering, this technique helps establish roots quickly. By following these tips and arranging your bulbs thoughtfully within borders, you’re setting yourself up for success this spring and ensuring joy blooms season after season.
Optimal Planting Times for Spring Bulbs
| Bulb Type | Optimal Planting Time | Soil Requirements | Planting Depth |
|---|---|---|---|
| Daffodils | September – October | Free-draining soil | 3 times the bulb’s height |
| Crocuses | September – October | Free-draining soil | 3 times the bulb’s height |
| Tulips | November | Free-draining soil | 3 times the bulb’s height |
| Snowdrops | Early spring (in green) | Free-draining soil | 3 times the bulb’s height |
| Scillas | Early spring (in green) | Free-draining soil | 3 times the bulb’s height |
Planting Bulbs in Containers
Most bulbs grow well in containers, providing a flexible way to light up patios, balconies, and small gardens. When choosing pots, select deeper options that allow roots to spread comfortably, preventing overcrowding as the season progresses. Mix grit into peat-free compost before filling your container to improve drainage, as soggy soil can cause rot. You want tulips or alliums growing strong without concerns about waterlogged conditions.
As you plant, get creative! Arrange bulbs closer together than in garden borders for a striking display from the start. While tightly planted bulbs may bloom beautifully at first, they might not flower as well in later years if left undisturbed, consider adding new bulbs each year for ongoing color. Monitor moisture levels; check regularly during dry spells and ensure your containers stay moist while vibrant shoots break through the ground. With some care now, you’re set for colorful bursts next spring, all thanks to smart container gardening!
Creating a Bulb Lasagne Effect
Layering bulbs creates a beautiful display that unfolds throughout spring. Start with the largest bulbs, like tulips or alliums, at the bottom of your container. These later bloomers provide the base for your arrangement. Add mid-season flowers like daffodils and finish with early bloomers like crocuses or grape hyacinths at the top layer.
This setup ensures that when one type fades, another begins to blossom in vibrant color.
Planting Depth
Planting depth matters for each bulb to thrive in its layered setting; bury them at least three times their height for best growth! By planting now during autumn, you give each bulb enough time to root before winter, a vital step for healthy blooms in spring. Ensure good drainage by mixing grit into potting compost; soggy conditions can harm these delicate plants! With careful layering and attention to detail, you’re creating a colorful display against nature’s backdrop when those first warm days arrive next year.
Spring Blooms Await: Myths and Facts Unveiled
-
Many spring-flowering bulbs, like daffodils and crocuses, thrive when planted in autumn to grow roots before winter.
-
The word “bulb” refers to various underground food-storage organs, including true bulbs like daffodils and tulips, corms, tubers, and rhizomes.
-
Planting at least six bulbs together creates a more attractive display; for a standout look, aim for 25 to 50 bulbs.
-
A bulb lasagne involves layering different kinds of bulbs in one container, placing larger, later-blooming flowers at the bottom and smaller, earlier-blooming ones on top.
-
Bulbs need sufficient water during their growth phase; monitor those in containers to prevent the compost from drying out completely.
Watering and Feeding Spring Bulbs
Watering spring bulbs is essential for their care and affects how well they bloom. After planting, monitor moisture levels, especially in containers. During autumn and winter, rainfall usually provides sufficient water; yet, check pots during dry spells, particularly as new growth starts in spring, to prevent them from drying out. Bulbs planted in borders typically need less attention once settled, but ensure the soil stays slightly damp if conditions are very dry while establishing roots.
Feeding Your Bulbs
As shoots start to poke through the ground, it’s time to think about feeding! Using a high-potassium fertilizer like liquid tomato feed can boost flowering potential for next year’s display. Begin this process when the first green tips appear and continue until the foliage turns yellow before dying back, follow product guidelines specific to the bulb varieties you’re caring for. By consistently watering and wisely feeding your bulbs, you’re preparing for flowers and creating a garden that will thrive come springtime! Each step taken now sets off a transformation that combines nature’s beauty with your gardening efforts into one stunning scene for everyone to enjoy.
Protecting Bulbs From Pests and Rot
Once bulbs are planted, protect them from underground and above threats. Squirrels and small animals can dig in freshly planted areas looking for food or out of curiosity. To deter these pests, cover the planting area with wire mesh after placing the bulbs. This barrier will help keep critters away until spring brings shoots that indicate growth.
Watch out for slugs and snails, which can damage tender leaves, especially in wet conditions. Handpicking these pests can be effective, and using biological controls designed for slugs can manage their populations without harming beneficial insects.
Rotting bulbs are a concern related to soil conditions rather than pests. Poor drainage can lead to rot, risking healthy bulbs before they grow in spring. Check drainage thoroughly before planting; ensuring soil drains excess moisture is crucial for bulb health during winter. Mixing grit with compost or improving heavy soils can enhance aeration around each bulb’s roots.
Summary
keeping your newly planted treasures safe requires attention on several fronts: protecting against animal disturbances while watching out for common pests like slugs and managing soil moisture levels diligently ensures that vibrant blooms emerge beautifully from healthy plants come spring! Every step taken now strengthens these budding beauties against future challenges, a commitment sure to reward you with colorful displays when warmth returns next season.
Your Guide to Spring Blooms
As your bulbs rest in the soil, look forward to the colorful display they will create in spring. Each bulb type adds its own charm, producing a vibrant mix of colors as winter ends. Imagine clusters of daffodils and crocuses emerging, a sign that warmer days are coming! To ensure this display occurs, provide each variety with proper care; from planting depth to moisture requirements, taking care now sets up future blooms.
Nurturing Your Bulbs
After all your preparation, remember to care for these plants once they settle into their autumn spot. Regularly checking moisture levels can help avoid surprises when growth starts, you don’t want those first shoots struggling due to dryness! Feeding them properly enhances flowering potential; it’s like giving them a gentle push toward thriving. Practicing patience during this waiting period will pay off with bursts of color, a true reflection of your dedication to gardening!
FAQ
What is the best time to plant spring bulbs in autumn?
Plant spring bulbs in the fall: daffodils and crocuses from September to October, tulips closer to November to reduce fungal disease risk.
How deep should I plant my bulbs for optimal growth?
Plant bulbs at a depth three times their height for optimal growth, according to the Royal Horticultural Society (RHS).
What are the benefits of planting bulbs in groups rather than individually?
Planting bulbs in groups of at least six enhances visual appeal, with larger groupings of 25 to 50 bulbs providing an even stronger display.
How do I create a bulb lasagne, and what layers should I include?
For a bulb lasagne, layer tulips at the bottom, daffodils in the middle, and crocuses on top for varied blooms in spring.
What type of soil conditions do spring bulbs prefer for healthy growth?
Spring bulbs thrive best in warm, sunny spots with well-draining soil, according to the Royal Horticultural Society (RHS) and Tates of Sussex.
How can I protect my newly planted bulbs from pests and diseases?
Cover newly planted bulbs with wire mesh to deter animals, check for slugs and snails, and use well-draining soil to reduce rot and disease risk.